Wednesday, 5 August 2015

DIY Cottage Apartments for your Sylvanians

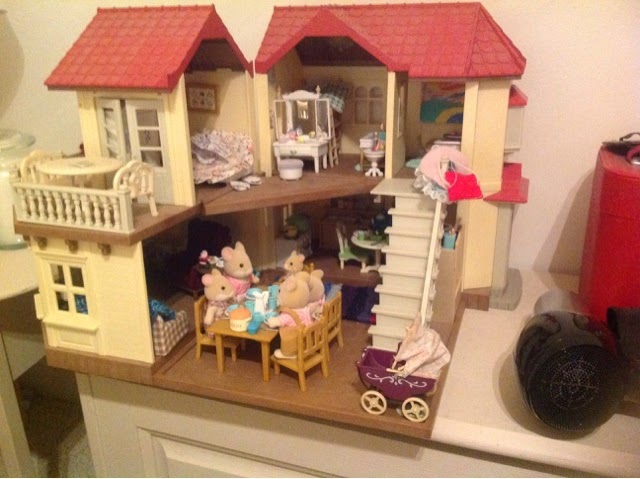
Hi everyone! This is a good DIY to do when you need more room for your figures. Imagine them Without a home!! I needed to make two houses, but only Had enough plot for one . So , I thought to myself, what could I make? AHHH. Two houses that look like one! One on top of the other!

I had started this post, and was blogging it along the way but blogger deleted it. Oops. Luckily I didn't get too far.
*******IT IS VITAL THAT IT IS TAKEN IN ACCOUNT THAT I HAVE USED WALLPAPER FROM http://www.jennifersprintables.com/ AND TAKE NO CREDIT FOR ANY OF THEIR WORK> THESE ARE DISPLAYED WITH A *. ******
(YOU CAN VISIT http://www.jennifersprintables.com/ FOR FREE DOLLHOUSE PRINTABLES)

You will need: 
FOR THE HOUSE
Two average size shoeboxes, a knife to cut, scissors to cut, hot glue gun, glue stick, wallpaper, some spare scrap cardboard, paint
FOR BEDDING AND FURNITURE
scrap cardboard, paint, fabric, sewing equip. Sticks, e.c.t

This is how far I got, I've cut out windows and doors on the bottom floor and wallpapered the inside.  
As you can see, I've added windows, doors, shutters, over hangs, flower basket holders, flower box, thin chimney and a door handle.
The inside has three walls wallpapered* with red thin and fat stripes, and one wall being the feature with a floral pattern (please ignore my bad wallpaper skills)  and also a cute fireplace. 

I glued the lid of the larger shoebox to the bottom of the smaller shoebox aswell, to make it easier


Now once you have done all that ^ (cutting doors and windows out, wallpapered the first floor, e.c.t ) you should have something like this to deal with.

The "first" thing to do now is to make this decision: 
How many figures are you housing? 
On the bottom floor,I'm housing five soon-to-be-revealed figures, two adults and three babies (guess in the comments below!!) . On the top floor, I'm housing the Fresian grandparents and their hedgehog baby. 

Since I don't think a whole shoebox is appropriate for three figures, I've done this. 
I've cut the top shoebox so there is three quarters left and then made a door On a new wall and given them balcony space.if you are housing another big family, you can leave it and skip these steps.
Now, cut out some cardboard to make a ladder and some safety rails for your balcony.

Start hot glue gunning your balcony rails , making sure you leave no gaps.

Now, add windows with flower boxes and shutters with overhangs, add as many as you please!
The next step is wallpapering the inside. For the wallpaper*, I used hot glue, but for the card, I used a regular glue stick. 
Then you must roof it. Cut out some cardboard that overhangs the sides by 2 cm, and then fold it like I have, to give it shape. Then cut out some sides to match. You can add windows if you want! Don't glue on the roof , however. Add slots if needed to keep it on, but you want to be able to remove it to play with the inside. 

Now, you've finished the cardboard mould. You have the option to paper mâché, but I thought it didn't really need it, as it already had shape. So I'm going to paint it. 

I went with burgundy windows, doors, balcony and roof with gold detail and then cream walls. I thought this was quite wintery, and also a very cosy design. (To make it like a summer house, you could have blue  windowsills e.c.t and white coloured walls!!) 
I painted the windows and all, and let it dry overnight before I painted the walls and added detail such as patterns. But I didn't let that time go to waste! I started designing and making furniture. Infact , I did a short DIY for Yankee candles which I uploaded in Sunday for you to check out !!! 

I decided to stick with tutorials by other people. 
I got my sofa tutorial from Kyra's blog: http://aeternumsomnium.blogspot.co.uk/2014/06/tutorial-how-to-make-sofa.html
And ideas from others.
I made two cots, one to accommodate 3 babies and the other to accommodate 1. 
how to make a cot out of a mini matchbox:

You will need: one mini  matchbox, lace, fabric, glue gun. Scissors.
1.  Take out the matches of your matchbox, and use the inside. Put some padding in the bottom of the matchbox.
2. Then , wrap some fabric around the box to make it look more aesthetically pleasing.
3. Choose some more fabric , and trace around the matchbox. It's important to do it with the white fabric on, so its the right shape and size. Cut it out for an oval shape. 
4. Stick the fabric on to the sides of your matchbox.
5. Stick on your lace and other decorations, it's complete !
Now we are going to get creative. If you don't want to stick something to your house, get a stick of cardboard, wood or anything else, and stick it to the back of your crib. Then, ontop of said stick, stick another "stick" going out wards. 
Gather some fabric and stick on lace, flowers e.c.t,
Glue gun the fabric to your "stick" or "rod"
That's my finished product! 
Now let's get on to the finished outside of the house: 
I made a ladder using two panels of sticks and 5 mini panels, and glued them all together! 
I really love the front THE MOST! 
I have little signs painted, the top says "keepers cottage" and is pointing to the ladder, to show it's upstairs. The bottom sign says " love cottage". 
 I haven't put in the flowers just yet, I'm still trying to figure that one out! 

But now for the insides, which I have furnished with furnishings made by myself:
The fresian grandparents will be delighted to see their new cosy home,with cot and fold out bed! They have a closet for Daisy's old clothes, too.

The new mystery family of five will love their new room! With a jumbo cot made from a Lush pot and a fold out sofa bed, aswell as a tiled fireplace, this place is a dream!
They will also love their hand made corner unit, Yankee candles, pots and fruit bowls.

CREDIT FOR WALLPAPER:
click on me to visit http://www.jennifersprintables.com/

Thankyou to http://www.jennifersprintables.com/ for the free wallpaper, I found it very useful :)


I hope you enjoyed this lengthy DIY! I will introduce you to the new family on their arrival, and I'm hoping deeply that they will love their new homes! thankyou for being so patient with my late arrival of this post! 
Lots of love as always, Emily xxxxxx

Sunday, 2 August 2015

DIY Miniature Yankee Candle

Hey everyone! So, the big DIY I have planned is taking ALOT longer than expected, but good news: I managed to recover the dress one , so when I've uploaded the big DIY I will work on the dress DIY. However, while scrolling through Pinterest for inspiration , i had an idea: minature candles! The best thing is, you only need four (five for coloured) things to make one!

You will need: mini jar, a candle, matches, some string, food colouring if you want a coloured candle. (Or just melt a coloured candle)

I got a weenie jar from My local craft store, in a pack for £1. 

As you can see, it's very very small!

1. Light your candle with your matches, you need to melt your wax so it goes from soIid to liquid, making it ready to pour into your mini jar.

2. While the wax in your candle melts, cut some of your string. I used some white string. You can use a wick if you want, but these candles aren't going to really be used.

3.Blow out your candle.

4. act fast! Skip this is you want a plain candle, but when you pour your HOT wax in to your jar, pour in food colouring at the same time. (Hint: for an extra !! Add in some small sparkly glitter so it really shows off!) 
plain:(need to pour more)
Coloured:

5. Put in your string and stir the mixture. Hold your string in the middle. 
The wax should set pretty quickly.
I actually found some wax strips and replaced the string, as they were straighter. I had to hold them till the wax set.

6. Voilà! A cutesy candle. You can print off Yankee candle labels and stick them on to make them extra cute: 
(I dont own this picture)

 I made two candles. One, I used food colouring and glitter, and the other I used a pink candle for the wax. You can see how they both turned out!:


You can surf the internet for other labels, but I actually enjoy the classic label aswell as the name tags 
If you saved or had a cork with the candle, you could put it on. If you want to fragrance the candle , you could give it a spritz with your fave perfume. 

--------------~---------------
I'm sorry for the late posts, but I promised a post by Sunday and I'm not finished with any others! So I just cooked this one up. (I'm sorry if you had this idea first, I wrote this on my own accord and thought process!!) :) 

Lots of love, Emily xxx


Friday, 31 July 2015

THE BEST THING (and then some)

Hey guys! It's Emily! Annoyingly, I wrote the THREE POSTS READY TO GO UP, BUT THEN THEY ALL DELETED!! Two diys and a post about getting out my sylvanians.
I said in the last post I should have the DIY dress post up by Sunday. I've made the dress and now I have to do it again, so I'm delaying the dress post till around Wednesday. But anyways, these are some pictures of  cornwood, I haven't put in figures because of a certain DIY and some packages need to come for me to finish said DIY, so that may take a week, but anyways, here is the fin product!
Thankyou all so much for the support, I hope I can bring you a DIY soon!!


Sunday, 26 July 2015

SUMMER POSTS, NEWSLETTER, FUTURE.

Hi guys! How is everyone? 
I thought today that I would do a post to update everyone on what's been going on with my sylvanians, so here we go!


                           SYLVANIAN TIMES NEWSLETTER SPECIAL, CORNWOOD

HOUSING IMPROVEMENT PROGRESS OVER THE YEAR
" I hate ignoring them, so I have out them in an open red old hat chest in my room. I have tables out and chairs for them to sit on. " 
"I think it's great, we used to be in a closed box, but now we are in an open chest, allowing us fresh air. I miss our houses, ALOT, but this is the next best thing, and we are loved very much, and we get to sit out on chairs and watch the days pass by. We also get the garden set, which we all take turns looking after the soil and growing tasty plants such as carrots, beetroot, pumpkin and lettuce. (And sometimes CABBAGE!! )" - maisy Hamilton. 
I
NEW THINGS IN CORNWOOD
The money we have gathered this year has been put to good use, we have bought a garden set so we can all garden together and dine on fresh veg.
we would also like to welcome the Fresian Grandparents. mr. Robert Fresian and Mrs. Lillian Fresian are welcomed to the neighbourhood.
we also welcome their adopted son, Joby Fresian! the cutest hedgehog we have ever seen , to the family. He will be joining the nursery after summer ends in September.
"family Photo" from the left, Mr Robert Fresian, Joby Fresian and Mrs Lillian Fresian.

I hope you enjoyed this issue.
THE MAYOR OF CORNWOOD

—--------------------------


Hi guys! It's been a while, hasn't it? Well, I thought i would post something just to update you all . I love my sylvanians dearly, and their houses, but I cant bring there houses out, as my brother got a drum kit. (Yay! (Says sarcastically))
But anyways, I do have a bit planned. 

HINT: NEW BUILDING DIY AND NEW OUTFITS DIY EEEEEKKKK 
I plan to make a hideout for my sylvanians under my bed, some of the houses are too big but others would fit under perfectly. I can't put in two story buildings : beechwood hall e.c.t , but it's better than nothing, and as I'm writing this, I'm looking at beechwood hall packed away under my desk! So, that's another blog post waiting to happen, don't you think? I think so! I have tons of shoeboxes lying around, so i might do some wallpaper and stuff for them and make them all nice inside providing houses for the sylvanians who lived in the big houses, but most lived in the small ones. I'll swap those houses with the things already under my bed, so everyone's happy! SO EXCITING! 

I think I'm going to do a DIY outfit post next, because I need to go to the craft store to get some supplies (but I think I'm going tomorrow , so we will see how it all pans out) but I've got loads of materials and my sewing machine all set up, and some dresses already made, so here's a sneak peak: 
Pictured: material dress with white collar and white rose, then red corduroy dress with white collar. 

note for my readers: I love you all, and I'm sorry for such a dry spell, but I've finished school for summer, so I'm now free!

Xxxxx, Emily .


Wednesday, 3 December 2014

Fresian family fact file

Hello everyone! I'm away this weekend, so I'm going to make a post now (I hop you don't mind:) ) 
The best post I could think of on such short notice (I had a quick brainstorm session) was a factfile. They include them in every issue of the Sylvanian Collectors Club magazine. Let's take a look at the Fresian family ! 
Daisy Fresian and Hornbull Fresian

The Fresian couple are probably one of the best . Daisy loves her well-paid job as a maid, however, her favourite part of the day is coming home , picking the two of her youngest from nursery and her youngest from babysitting, and watching them make a mess, just so she can clean it up again in her riverside barge home. 
Hornbull adores Daisy, he thinks about what he can bring back to her from working in the field all day, cutting down trees and planting new ones in his sweet logging and gardening business, which is known about across Cornwood and Sylvania. At Christmas time, he cuts down his Christmas trees from his special area in the wood, and picks up all sorts of growth for Daisy to make wreaths with.
Pixie Fresian 

Pixie Fresian is the oldest of the Fresian flock. Pixie has a solid relationship with Peter Periwinkle, and oh they are adorable. At Christmas, Pixie really milks it, and she does whatever she can to help out the village in preparing for the wonderful occasion. Would you believe it, Pixie organised the whole Christmas Day event, which meant she got to work and boss the mayor around! Fancy that, eh?

Paddock Fresian

Paddock deserves the award for sweetest sylvanian around. Paddock spends most his free time helping Daisy at her job, aswell as giving a hand in nursery, helping Pixie organise events, and spending time with his dear girlfriend, Cherry Periwinkle. It doesn't matter whatever he is doing,he would   drop it at an instance to go join Cherry. When she is Ill, he will go make her tea, and when she is upset, he would comfort her. Pixie and Peter are just the same , however, it's just that if Peter gets stuck into something, he wouldn't drop it for anything. 

Annabel, Felix, and Jack-Jack Fresian.

Annabel is the third oldest child (the order of age goes: Pixie, Paddock, Annabel, Felix (who are twins!) and then Jack-Jack) 
Felix and Annabel are trouble makers. They spend all their time making a mess, gluing things that should not be glued, and playing games with their food. Jack -Jack is renowned for being the golden child. He does not squeal when Daisy puts him down, he doesn not struggle with his food, and he rarely cries unless he is hungry, in pain, or has had a bathroom incident. 
However, if any of these three see a ball, they will make the ball their queen, and worship it till they die.


I hope you enjoyed this post, even if it was short!

Lots of love, Emily xx

Saturday, 29 November 2014

DIY your Christmas

Hello everyone, I'm back again as promised ! 
I'm this post I will be showing you how I decorated Beechwood hall in preparation for Christmas !
Before:

After:

the Christmas wreath : (story)

Ham Hamilton heaved the Christmas tree through the door, eager to get into the Christmas spirit as soon as possible. The tinsel had been put up, (it was still November, to which mrs.Hamilton was a bit of a Grinch about it ;) ) 
"I don't see why you have got the tree now, I mean, it will be all wilted by Christmas Day! "
"Well, I was driving past Hornbull's house, and he was selling Christmas trees from his wood, I mean, this one is exquisite , I couldn't just leave it.. Someone else would nab it! " exclaimed Ham.
"Why were you driving past Hornbull's, that's nowhere near from work!" Maise argued, laughing.
" I... I...."
"Yes?" Maise giggled,
"I was getting the nut roast."
"I KNEW IT! Ok, well that's understandable, I guess they could've run out, but what if the tree wilts?" 
"It won't, Maise dear, Hornbull cut it fresh in front of me, and it's a good healthy tree!" 
Maise and Ham simultainously smelt it.
"It smells gorgeous, dear." Maise said, like she was in heaven.
"IS THAT THE CHRISTMAS TREE, DAD? IS IT IS IT IS IT?!?" Peppa and Spice screamed in excitement, and in sync.
" yes! Gather round, gather round!" Ham and Maise laughed.
"Dad, it smells wonderful!" Peppa said happily. She walked off to inspect, while Masie went to take care of Emily who was sat in her chair, looking at Spice.
"Mum, Emily's looking at me in that way again," 
"Oh dear, she's just In awe of you, that's all!" Maise shook it off, she was now in a festive mood.

"Dad, this tree is magic! It's all sparkly and a dark, luscious green!" 
"I got it from the magic forest, that's why!"
"Really?" 
"No."
"Oh" Peppa giggled "where did you get it from?"
"Hornbull's back yard "
"Oh " Peppa started blushing .
"Peppa my sweet, come here," Maise asked Peppa
"Yes mum?"
"Can you go outside and get some roses from the rosebush? For the Christmas wreath?" 
"Ok!" Peppa squealed in happiness
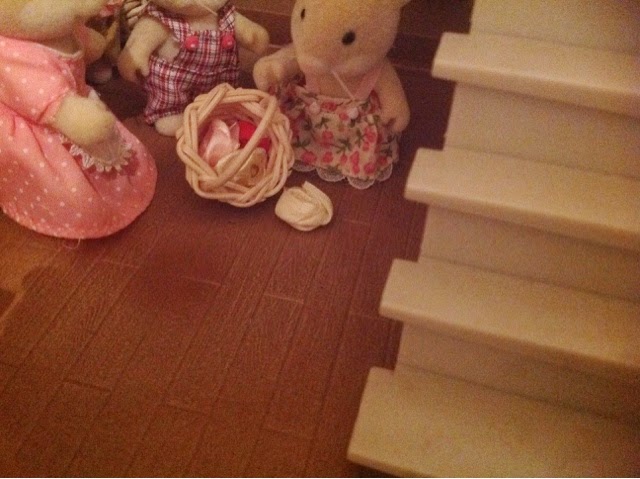
Peppa got her basket, and went out.
When Peppa returned, she let out a massive yawn, before collapsing on the hardwood floor.
"I have them, mum" 
Peppa was most definetly exhausted.
"Oh deary me, but, I love these roses! Peppa you have done very well, eat tea then go have a bath before bed."
At the table,  Maise presented the wreath infront of the family.
"Mum, this wreath is so pretty!" 
"I love it!"
"Wow!" 
The family was truly proud. It was nearly Christmas....

I HOPE YOU ENJOYED THAT!
It wasn't my best post, but I hope you see through it aha :) 
Merry Christmas :) 
Do any of you have your decorations out yet? 

I do ! <3

As always, lots of love, Emily xxxxx


Tuesday, 25 November 2014

Sylvanian families update

Hi everyone! This post today is about a latest project, and also an update. 
I just wanted to remind everyone that I wish I could get my sylvanians out, but it's more of a storage issue now, and less of a pressure issue, which I talked of in the worst blog post I have ever made, (packing up) . However, less of the sad side, and more of the happy stuff, right ? :D

I have got beechwood hall out, as it's a tradition of sort to do a Christmas display, and expect a lot of DIY posts coming soon !! (EEK! ) you can expect:
Christmas decor
Cushions and blankets
Coats, hats and dresses
stories :D

I KNOW, ITS SO EXCITING ! 
I want to try blogging ALOT more, as I have drifted away, and, if I'm honest, I don't like it one bit.

I feel that you guys are my family, and in family, no one gets left behind (note inserted Lilo and Stitch quote ) 

So,  let's get into the mood ? You should get a new post every week, wether it's a story, a DIY or something else :)

Now, onto my new announcement and project, which I promised my blogger friend Kyra I would announce. 

A few weeks ago, I started a youtube channel on basically my everyday life and some beauty tips. I don't want people to see this as a transition from childhood to teenagerism (if that's even a word) but me just showing a Different hobby of mine (I'm still obsessed with sylvanians though, don't you forget that ;) ) 
It's a chance for you guys to get to know me better as well, and to see me face to internet :) 
My channel name is Hello Emily . Link here :http://m.youtube.com/channel/UCzE2WLQsjr7FIGK2U-TWMEQ

Sadly, I forgot to re -do my subscription to the sylvanian families magazine, so I'm jumping right on it and sending the letter off tomorrow :) 

IF YOU HAVE ANY COMMENTS OR QUESTIONS, COMMENT THEM BELOW! 
I love you guys so much, and I feel awful for the time gap. It makes me really sad thinking about it, so I'm gonna jump back on the bandwagon! 
Lots of love, Emily xxxx